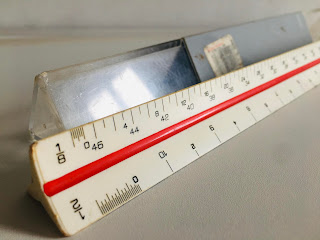
Measurements is a fundamental concept used in the design and manufacture industry especially for equipments intended for people. Without the ability to measure, it would be difficult for designers to produce objects and furniture that would fit human use and comfort. In making these objects, the planning and design phases are one of the first steps they would undergo, and one of the important tools they would use are the scales with system of measurements used in the drafting of the plans. Since the furniture/manufacture industry uses smaller measurements than that of the built environments, the English system is being used because, historically it was rooted by using the body parts as means of measurement, thus the relationship. In the modern furniture sector we use measurements expressed in foot/inches.
If you were not able to find this type of scale in the market. Here are steps that you can follow to make one of your own.
Gather all the materials needed for this activity. They are:
1. Board (illustration / used folder as long as there are no markings on it)
2. Ruler for reference
3. Pens (.5, .3, .1)
4. Scissors
1. Board (illustration / used folder as long as there are no markings on it)
2. Ruler for reference
3. Pens (.5, .3, .1)
4. Scissors
5. Adhesive (scotch tape)
Instructions:
1. Grab your used boards and trace your existing ruler (preferably 12”) using your pencil.
2. Using your scissors, cut the traced shape. You may use double layer, if your desire is to make your scale thicker.
3. To make your scale 1:1/8”, use the inches side of your ruler and mark all the 1/8” measurements.
4. For every 1/8” you marked now becomes your 1st inch, 2nd, 3rd and so on.
5. Continue marking until the last reference from your ruler is reached. Ink your guidelines, and add the continuous corresponding numbers and scale label. Careful not to make a mistake when you’re inking.
6. To make your 1:1/4”, do the same on the other side of your board, this time, using every 1/4” divisions of your ruler. Follow inking instructions on step 5.
7. To make your 1:1/2” on the back side of your board, this time, using every 1/2” divisions from your ruler.
8. Then finally, do the 1:1 inches measurements on the last side. Follow inking instructions on step 5. Once you have all your scales marked from 1:1/8”,1:1/4”, 1:1/2” and 1:1, you may add your name on your scales and the date you made them. Have your scales laminated for added structure. For those who cant, improvise by using your handy adhesives or scoch tapes to cover your entire DIY english scale for added strength and protection from dirt and inks.


thank you ma'am for the information
ReplyDelete